

Starting the bluetooth service
First of all we need to install the bluez tool that handles the linux Bluetooth protocol stack. Next, start the corresponding service.
userk@dopamine:~$ sudo apt-get install bluez-* python-gobject python-dbus
userk@dopamine:~$ sudo service bluetooth restart
Let’s use the HCI device configuraton utility, call the hcitool program asking for the device address, if everything works you should see your address.
userk@dopamine:~$ hciconfig
hci0:	Type: BR/EDR  Bus: USB
	BD Address: AA:BB:CC:DD:5A:EC  ACL MTU: 1022:8  SCO MTU: 183:5
	DOWN
	RX bytes:670 acl:0 sco:0 events:46 errors:0
	TX bytes:2459 acl:0 sco:0 commands:46 errors:0
	Features: 0xff 0xfe 0x0d 0xfe 0xd8 0x7f 0x7b 0x8f
	Packet type: DM1 DM3 DM5 DH1 DH3 DH5 HV1 HV2 HV3
	Link policy: RSWITCH HOLD SNIFF
	Link mode: SLAVE ACCEPT

userk@dopamine:~$ sudo hciconfig hci0 up
userk@dopamine:~$ hcitool dev
Devices:
	hci0	AA:BB:CC:DD:5A:EC
Scan devices
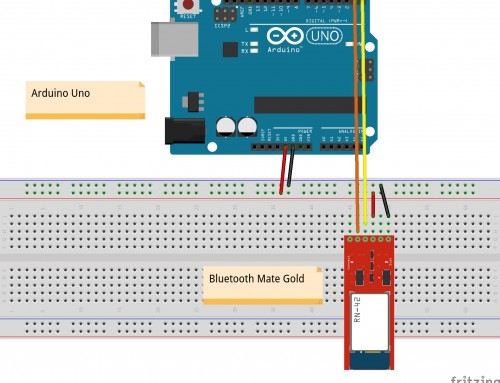
Upload the sketch on the Arduino. And connect the blueooth module as shown in the connected post. Once you connect the TX and RX wires to the Mate module, you won’t be able to communicate or upload sketches anymore.
Open a terminal on the linux machine. Scan for devices
userk@dopamine:~$ hcitool scan
Scanning ...
	00:06:66:68:20:61	RNBT-2061
	08:3E:8E:CA:8E:8E	ubuntu-0
userk@dopamine:~$
Iff the last command return the address but a not available Name of the device, try again and it will fix the name issue.
You should be able to see the RNBT now. Copy the corresponding address, 00:06:66:68:20:61.
Now we need to bind the virtual serial port /dev/rfcomm0 to the remote device connected to the Arduino. The last character 1 refers to the channel.
userk@dopamine:~$ sudo rfcomm bind 0 00:06:66:68:20:61 1
Can't create device: Address already in use
You shouldn’t get this error the first time you try to connect but you will see it a couple of time in future. So if that happens, just release the device with.
userk@dopamine:~$ sudo rfcomm release 0
userk@dopamine:~$ sudo rfcomm bind 0 00:06:66:68:20:61 1
userk@dopamine:~$ rfcomm
rfcomm0: 00:06:66:68:20:61 channel 1 clean
If you need to associate the pin to the device follow these steps. What follows is not compulsory.
userk@dopamine:~$ bluetooth-agent 1234 00:06:66:68:20:61
userk@dopamine:~$ sudo rfcomm connect 0 00:06:66:68:20:61
Connected /dev/rfcomm0 to 00:06:66:68:20:61 on channel 1
Press CTRL-C for hangup
Minicom
Leave the terminal opened and in another window call minicom with colours.
userk@dopamine:~$ sudo minicom -s -c on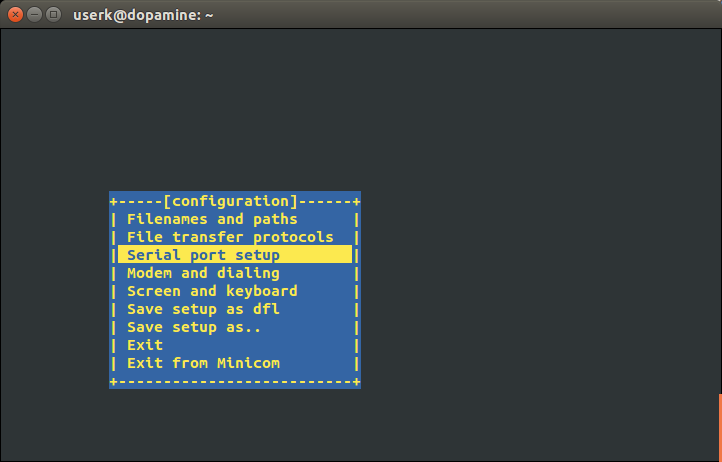
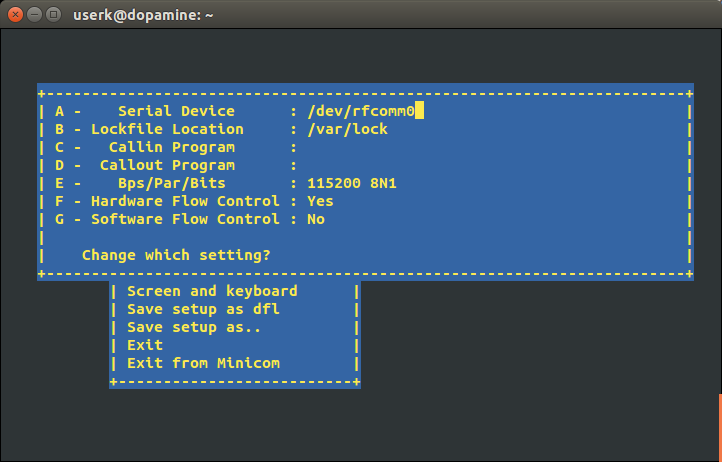
Change the port to /dev/rfcomm0.
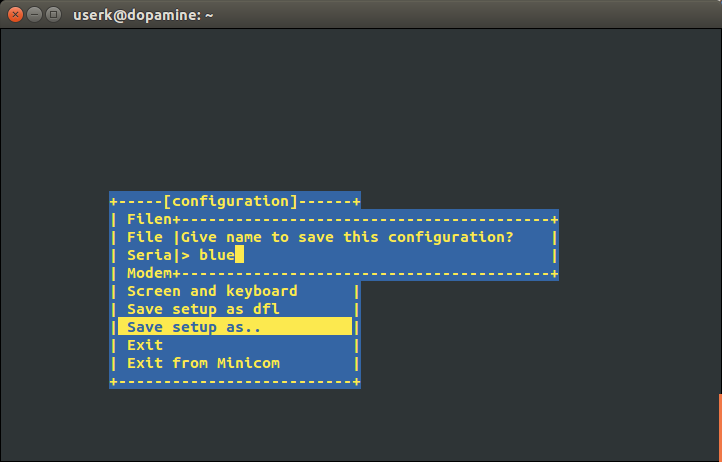
Save the profile as blue.
Now, we can finally use Minicom to send data via bluetooth to our Arduino board.
userk@dopamine:~$ sudo minicom blueTo exit Minicom console hit enter, then ctrl-A then q.
Once the first connection has been established and the devices have been paired, you can now connect to the device with:
userk@dopamine:~$ sudo rfcomm bind 0 00:06:66:68:20:61 1Hope it helps!

![Linux Utilities and Commands 1.20 – [Quick]](http://www.userk.co.uk/wp-content/uploads/2017/03/linux-500x383.jpg)
![[ Xenomai Experimental Result ] Dual kernel approach for a Real Time System with Raspberry Pi Model B](http://www.userk.co.uk/wp-content/uploads/2016/10/wall-500x383.jpg)